Frequently Asked Question
Cisco VPN Client
Last Updated 11 years ago
Before installing the VPN client make sure that Internet is working on your system properly.
Step-1
Installing the CISCO VPN Client software:
Download VPN Client software from the following sources
Windows 7 (32-bit)
Windows 7 (64-bit)
Linux
MAC
Double click on the exe file. Then click “Unzip”
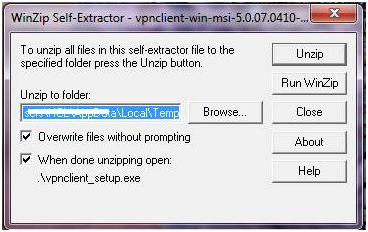
It will ask for Unzip the software, click “unzip”.
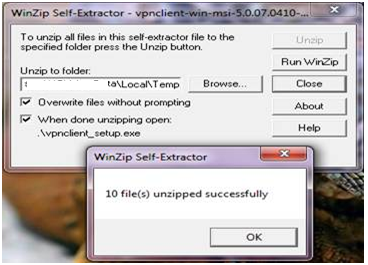
Then Click “OK”
Then it will take some time for initialize system hardware configuration.
Then following screen will appear.
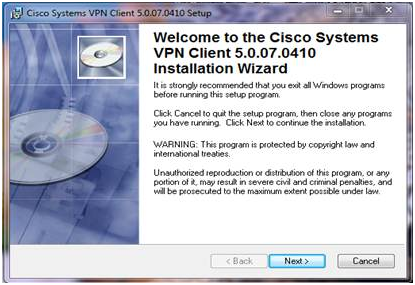
Click “Next”
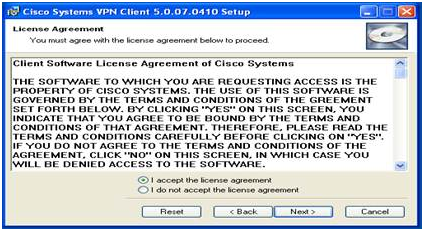
Then click the option button
“I accept the license agreement”.
Then Click “Next”
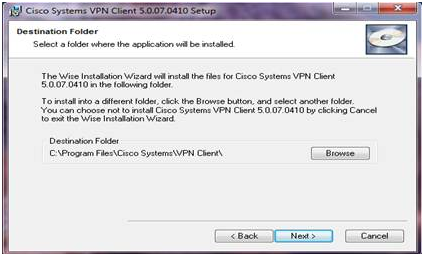
You can specify the installation path (optional).Then click “Next”.
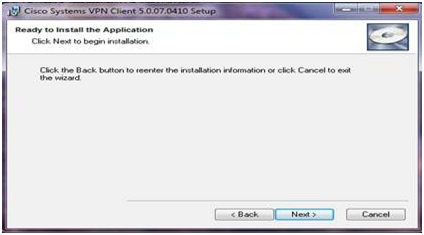
Again click “Next”
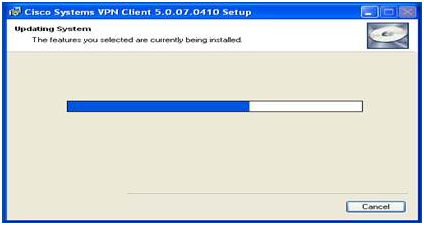
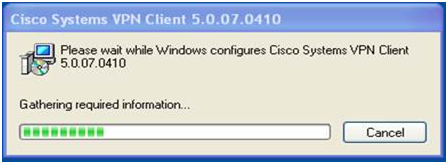
It will update the system for software installation, and installation process will be going on.
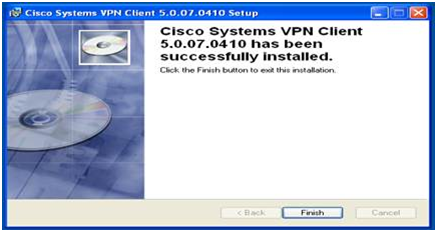
Click “Finish” for complete the installation process.
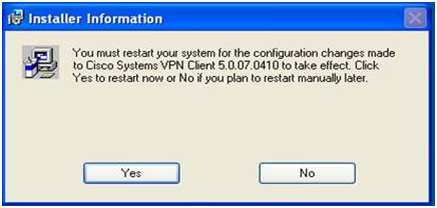
It will ask for restarting the system. Click “Yes”
After Rebooting following screen will be appear.
Step-2
Configuring VPN Client:
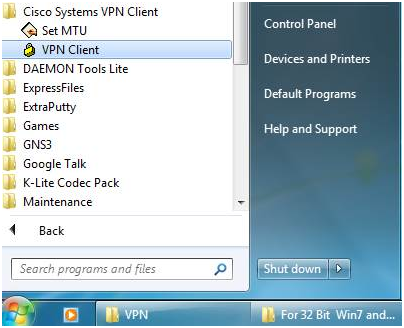
After installing Cisco VPN Client then click to start menu – Then click “Cisco System VPN Client”
Click on “Import” to import the .pcf file
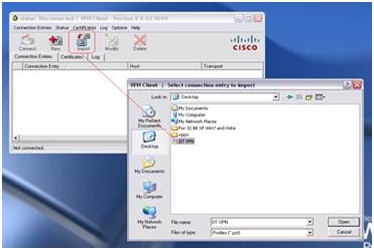
Specify the location of the .pcf file the click “Open”
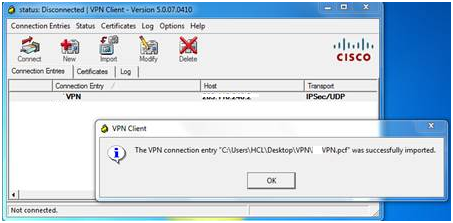
Then click “OK”
After successfully import the .pcf file please check the internet connectivity of the system if it is working perfectly the try to connect VPN.
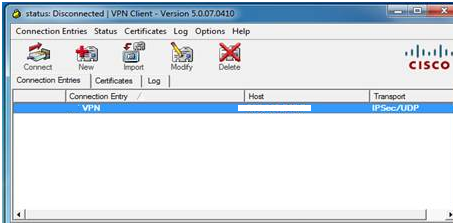
Select “VPN” Then click “Connect tab”
It will be asking for username and password.
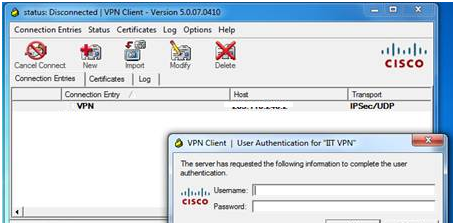
Give the user name and password as provided. Then Click “OK”
It will take time for authentication after successfully authenticate the vpn client window automatically disappear from screen. And you will find one icon at your task bar.

Click on that icon. You will find the status of the VPN client.
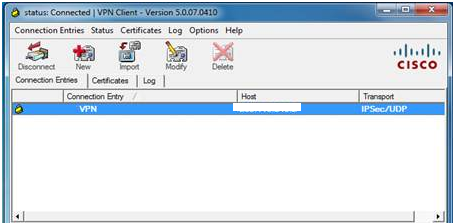
If you want to disconnect then Click “Disconnect”
Step-1
Installing the CISCO VPN Client software:
Download VPN Client software from the following sources
Windows 7 (32-bit)
Windows 7 (64-bit)
Linux
MAC
Double click on the exe file. Then click “Unzip”
It will ask for Unzip the software, click “unzip”.
Then Click “OK”
Then it will take some time for initialize system hardware configuration.
Then following screen will appear.
Click “Next”
Then click the option button
“I accept the license agreement”.
Then Click “Next”
You can specify the installation path (optional).Then click “Next”.
Again click “Next”
It will update the system for software installation, and installation process will be going on.
Click “Finish” for complete the installation process.
It will ask for restarting the system. Click “Yes”
After Rebooting following screen will be appear.
Step-2
Configuring VPN Client:
After installing Cisco VPN Client then click to start menu – Then click “Cisco System VPN Client”
Click on “Import” to import the .pcf file
Specify the location of the .pcf file the click “Open”
Then click “OK”
After successfully import the .pcf file please check the internet connectivity of the system if it is working perfectly the try to connect VPN.
Select “VPN” Then click “Connect tab”
It will be asking for username and password.
Give the user name and password as provided. Then Click “OK”
It will take time for authentication after successfully authenticate the vpn client window automatically disappear from screen. And you will find one icon at your task bar.
Click on that icon. You will find the status of the VPN client.
If you want to disconnect then Click “Disconnect”